Making a bootable live openSUSE USB is not that much easy as creating live USBs of other linux distributions but an elegant linux distribution deserves that. So to simplify things I have created this post with screenshots.
There is a guide located in the openSUSE official website. But newbies will find it difficult to follow that guide. Many users will try to use unetbootin to create live USB but it won't work for the openSUSE versions above 11.1.
Windows users
For windows users there is an application sized 31KB called SUSE Studio Image Writer.
Open that application.
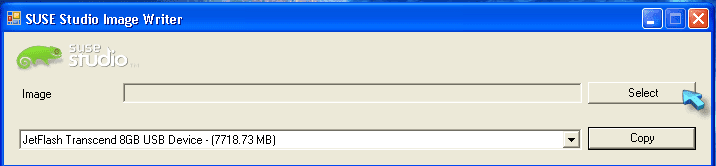
Now press select button.
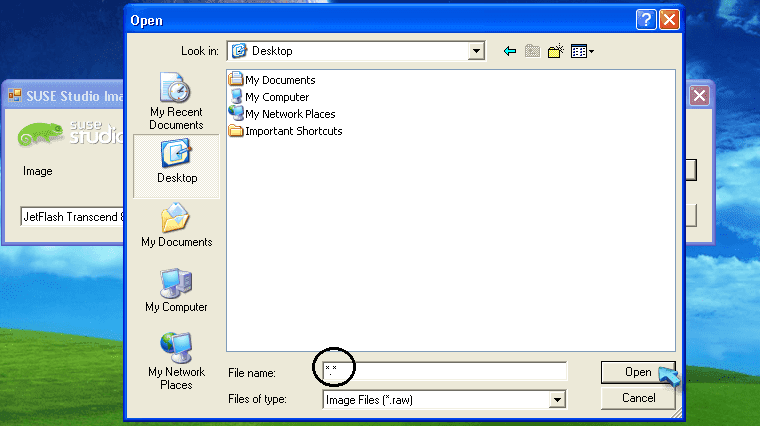
Here I have put the downloaded openSUSE image file in desktop.
Select the path where the .iso file is in.
Enter *.* in the file name. Then press open.
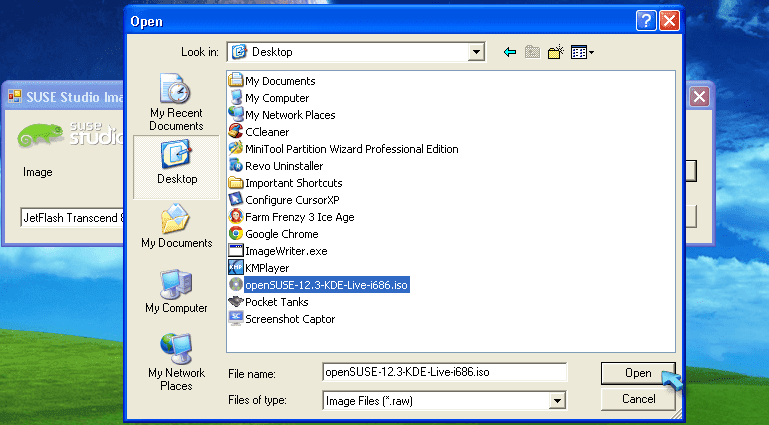
Now your image file will become visible. Select your .iso image file and press open.
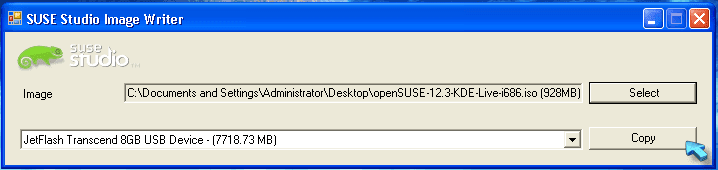
Now select Copy.
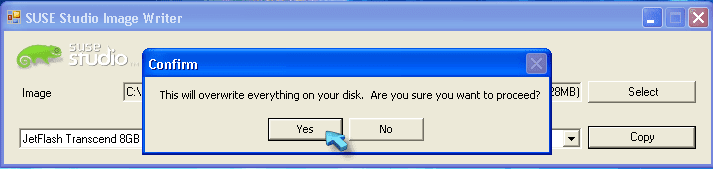
Then select Yes.
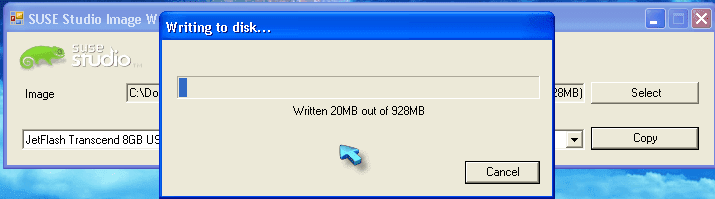
It will take some minutes. Be patient.
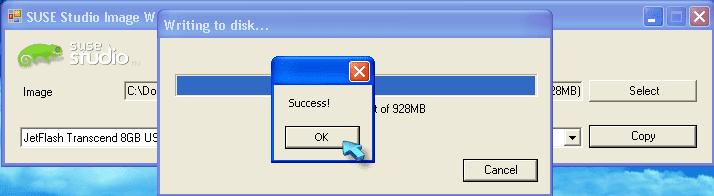
If you are seeing the above image your USB is ready. Press OK and restart your system. Don't forget to edit your BIOS settings to boot via USB.
Linux users
First you must find out your USB device name in order to make a live openSUSE USB. Your device name will be like /dev/sda or /dev/sdd. . .
To find out your device name enter the following command in your terminal.
sudo fdisk -l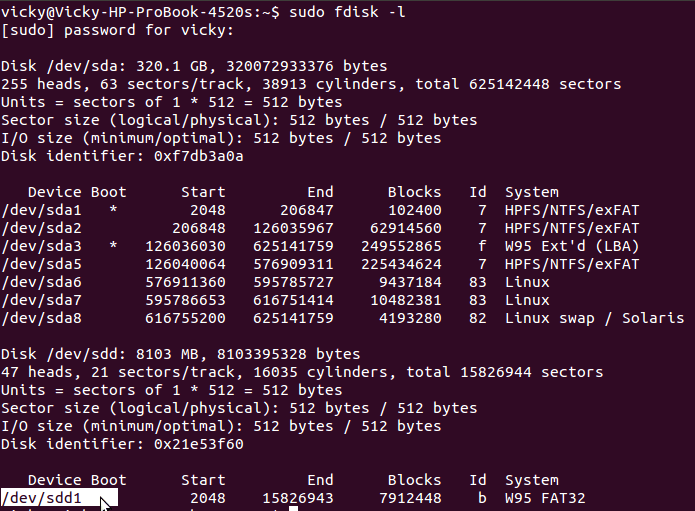
Here the highlighted one is the correct USB device name. Don't use the number following the device name in commands.

I have the openSUSE.iso file in the Downloads folder so I have entered the command below.
cd Downloads
It will be easy if you copy the .iso file to your Downloads folder so that you can use the same command.
Enter the following command to your terminal to make a live bootable USB
sudo dd if=openSUSE-KDE-LiveCD-Build0476-i686.iso of=/dev/sdd bs=4M;syncYou must enter the name of your .iso file between if= and of.
So your code will look like
sudo dd if=yourisofile of=/dev/sdd bs=4M;syncHere /dev/sdd is my USB device name you must replace it with yours.
To make things easy after entering sudo dd if=o press tab to auto fill the remaining text so after pressing tab there will be
sudo dd if=openSUSE-KDE-LiveCD-Build0476-i686.isoIf you see the above image the .iso file is successfully copied into the USB.
Enable USB boot in your BIOS and start using the live USB.
Conclusion
I hope this post serves well to make a live openSUSE USB. After using the live USB you must format it to use it for other purpose. Feel free to post your queries as comments......